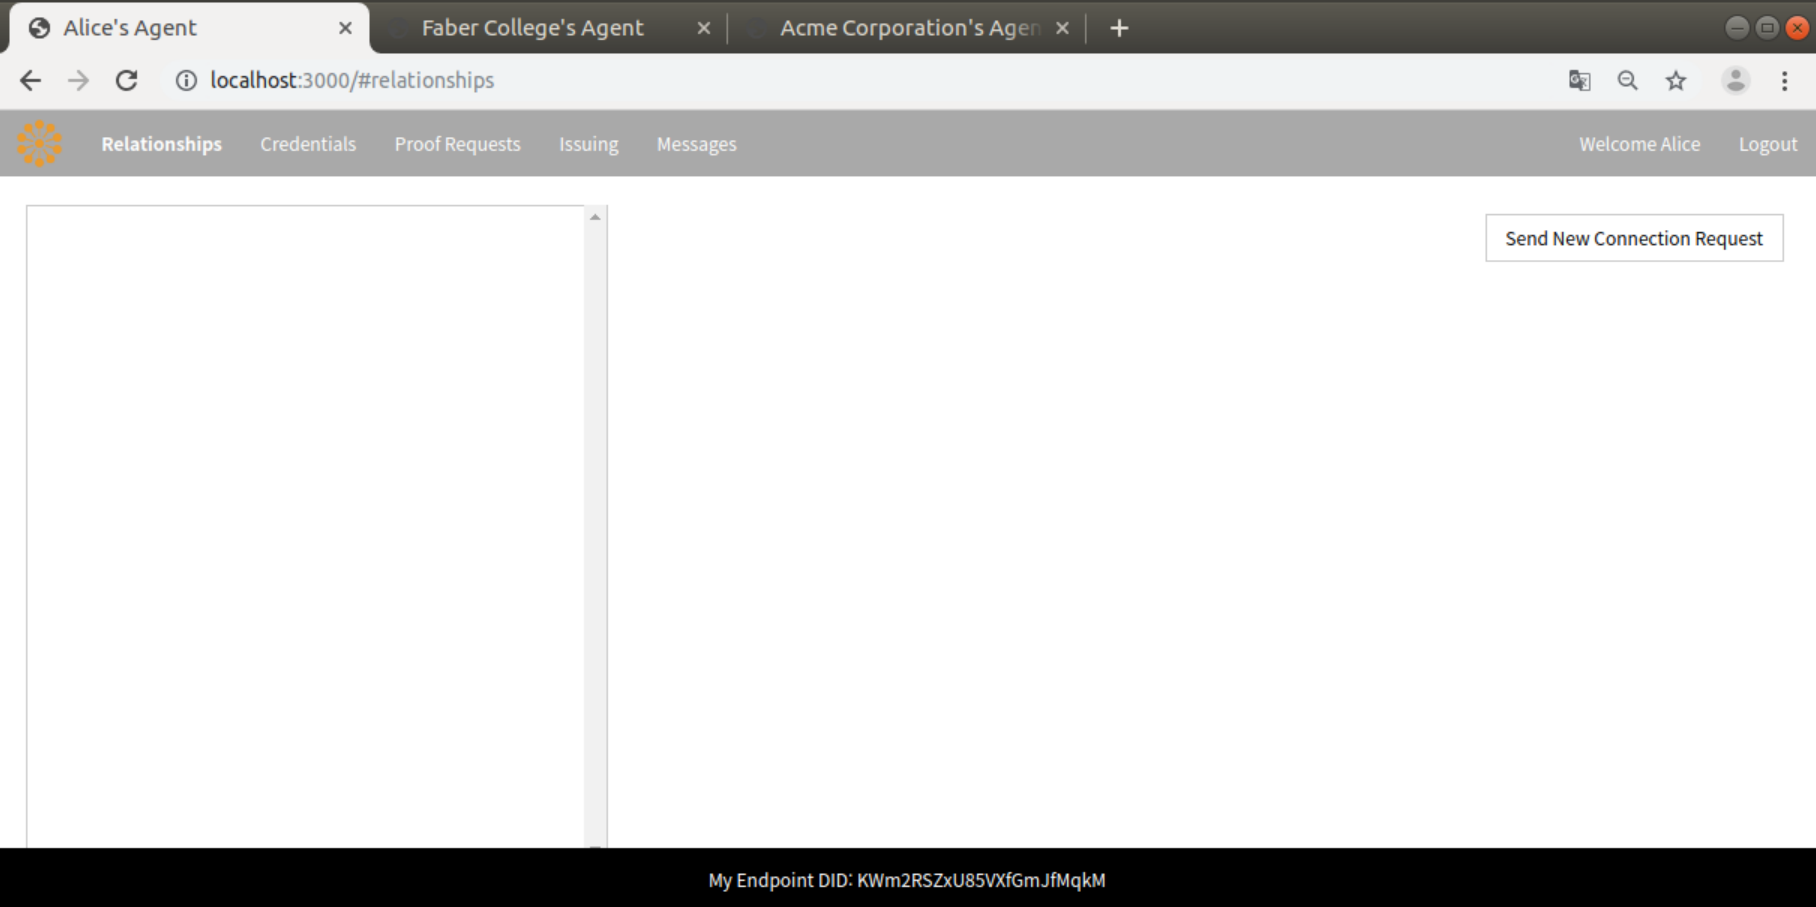
port 3000번에 연결하게 되면 Alice의 DID 관리 Agent의 relationship을 볼 수 있다.
relationship에서는 relation으로 연결된 다른 DID가 endpoint로 표시되며 또 다른 relationship을 생성할 수 있다.
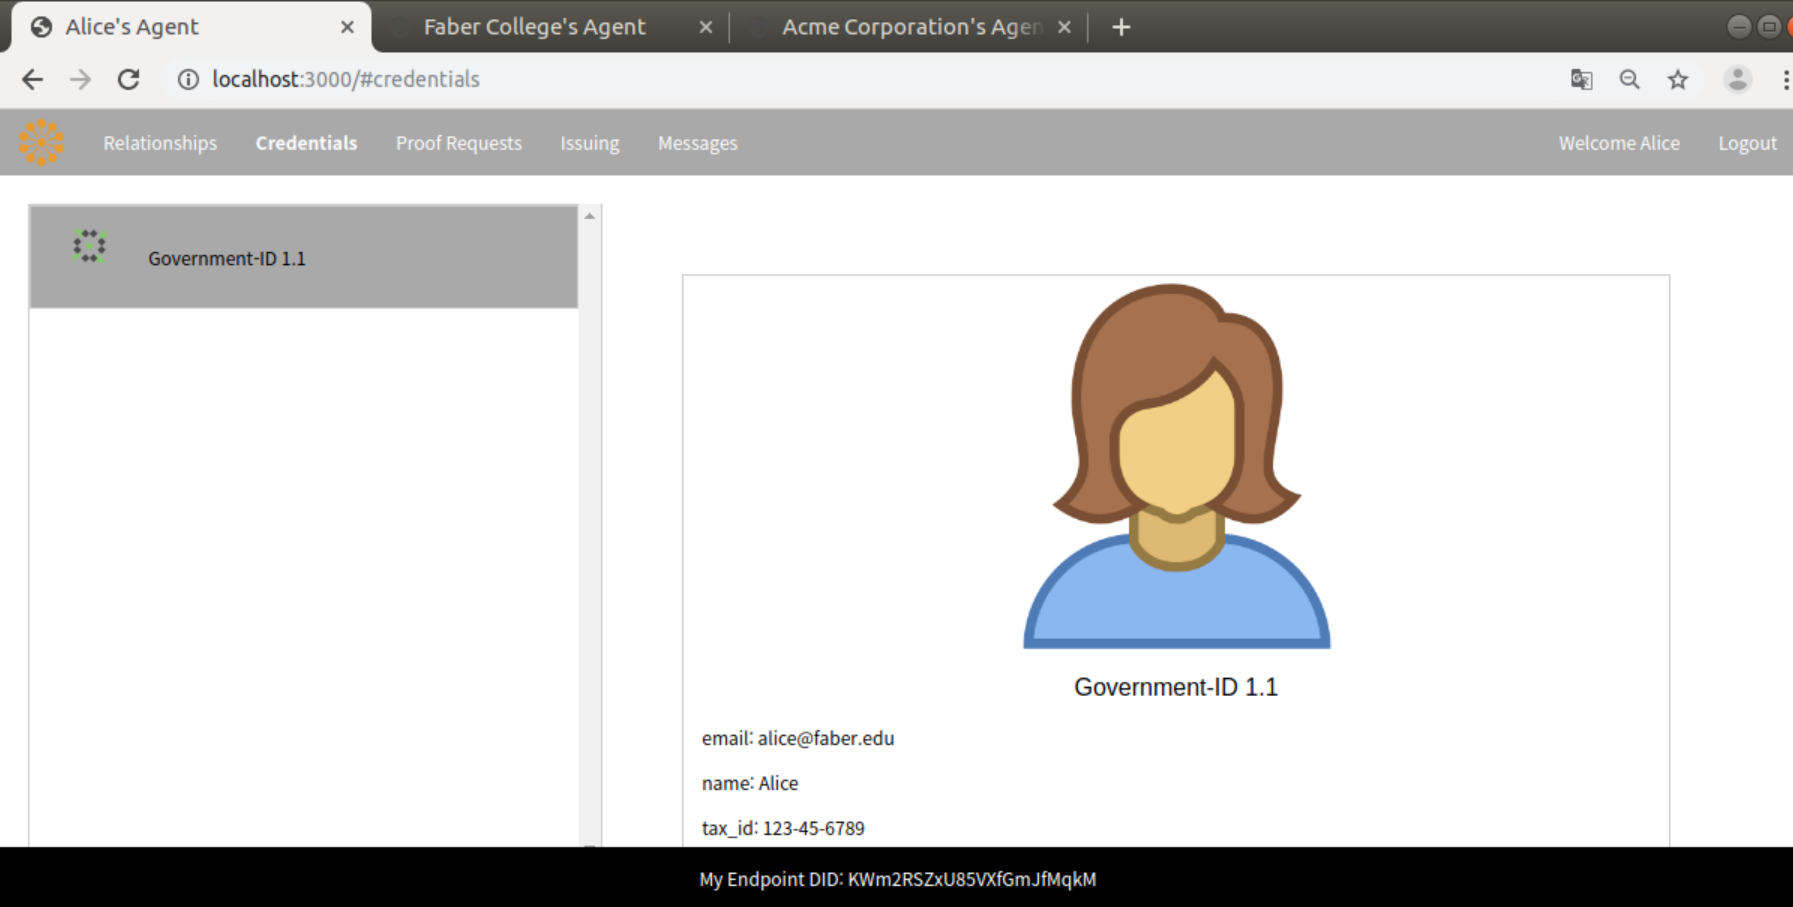
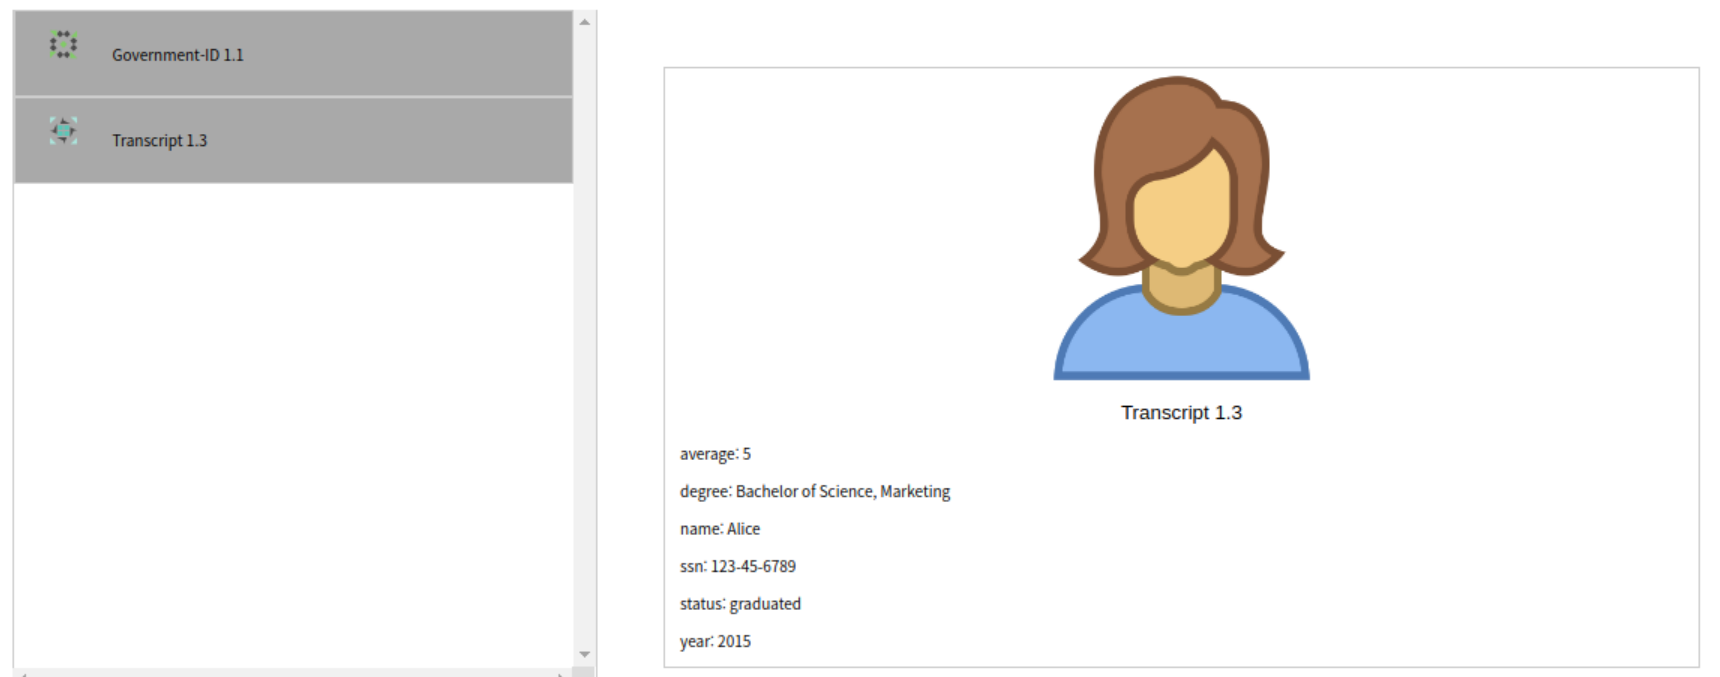
credentials 탭에서는 alice 인적 사항이 담긴 credential을 확인할 수 있다.
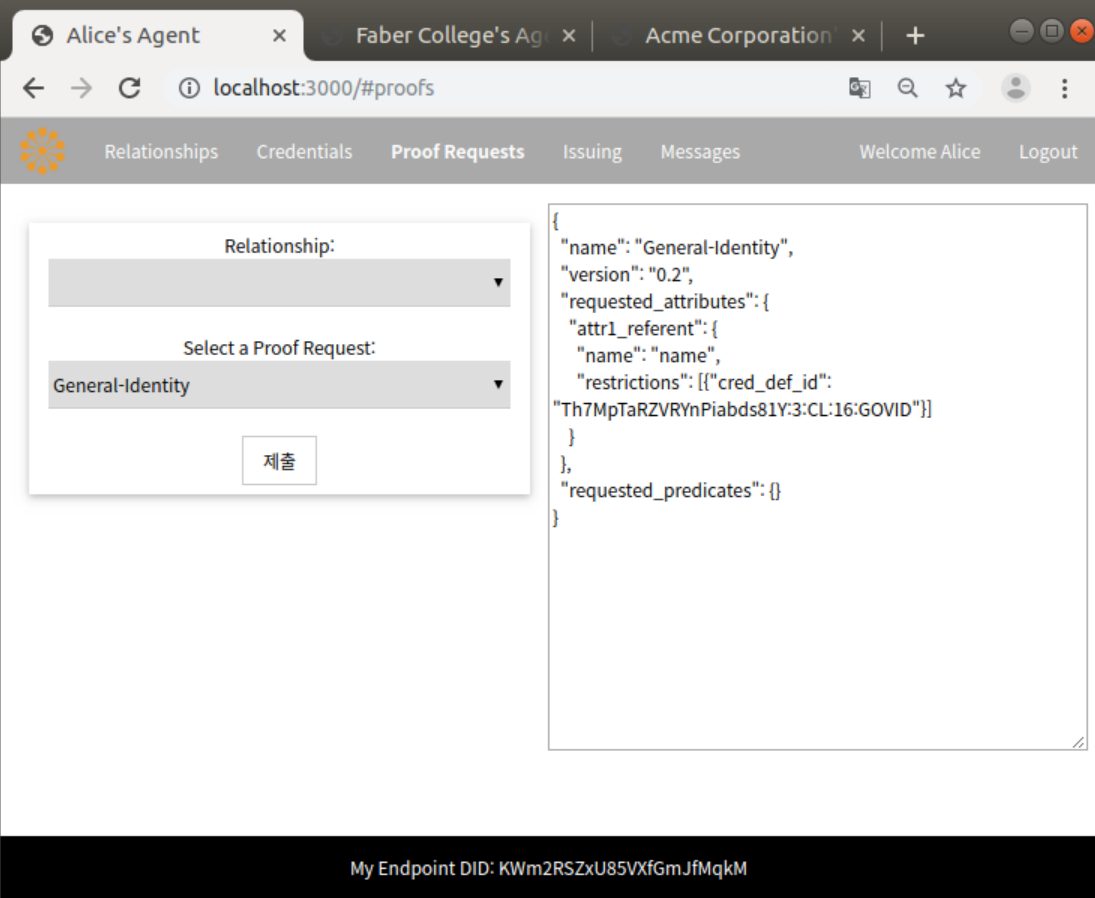
proof request 탭에서는 related 관계에 한해서 agent들과의 relationship이 표시가 되고 자격 증명을 요청할 수 있다.
아직은 생성된 relationship이 없기 때문에 proof request를 할 수 없다.
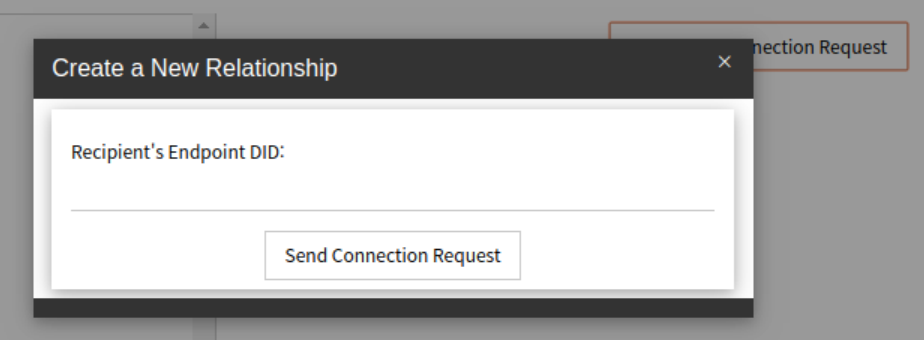
그렇기 때문에 alice의 relationship 탭에서 send new connection request를 클릭하여 요청할 agent의 DID를 입력한다.
이때 요청할 DID는 공개되어있다고 가정한다.
Faber College의 DID인 "N56wh3TW52z8BfN8odc5LY"를 입력한 후, send connection request를 클릭
send connection request를 누르면 터미널 창에서는
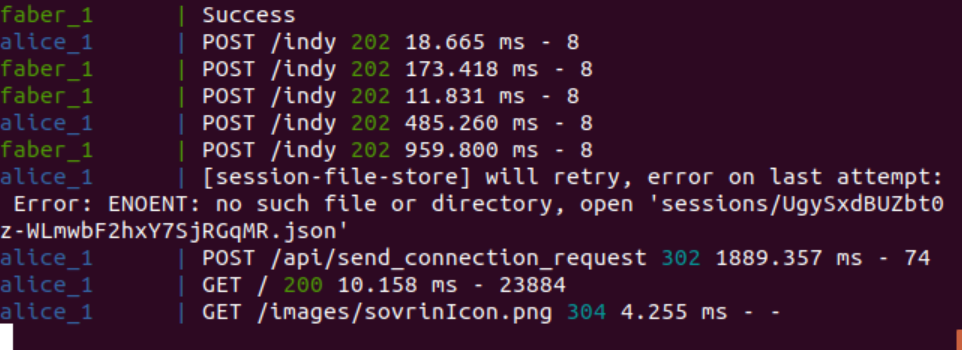
위와 같이 POST 요청이 완료되어 alice의 agent 페이지가 렌더링된다.
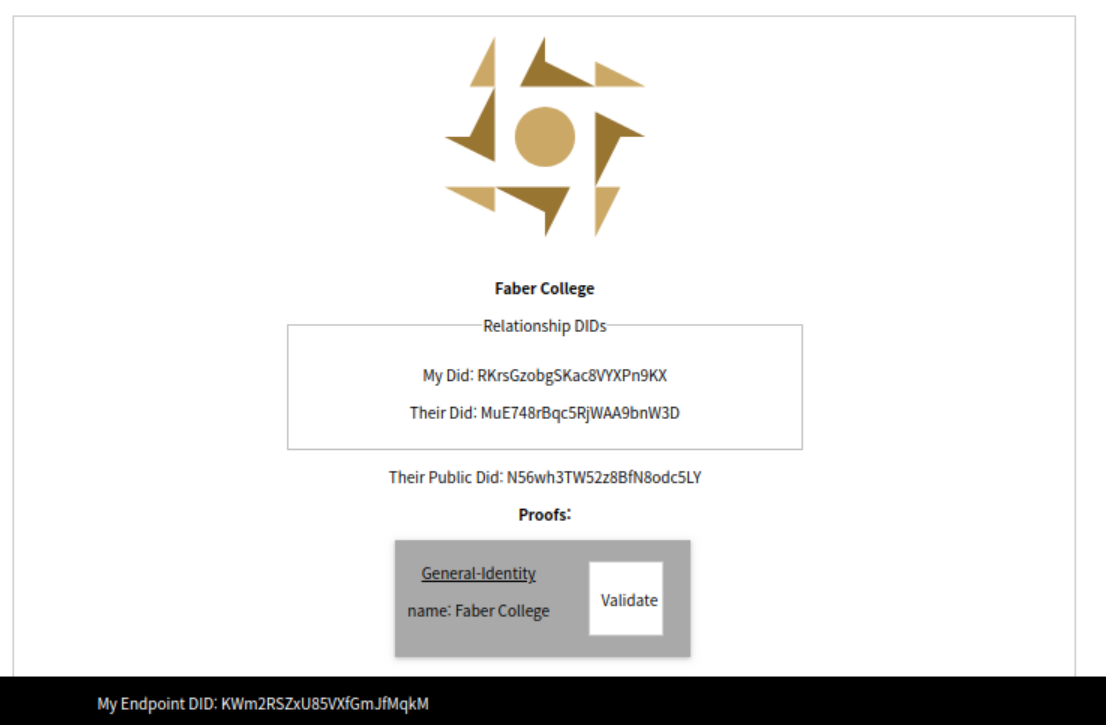
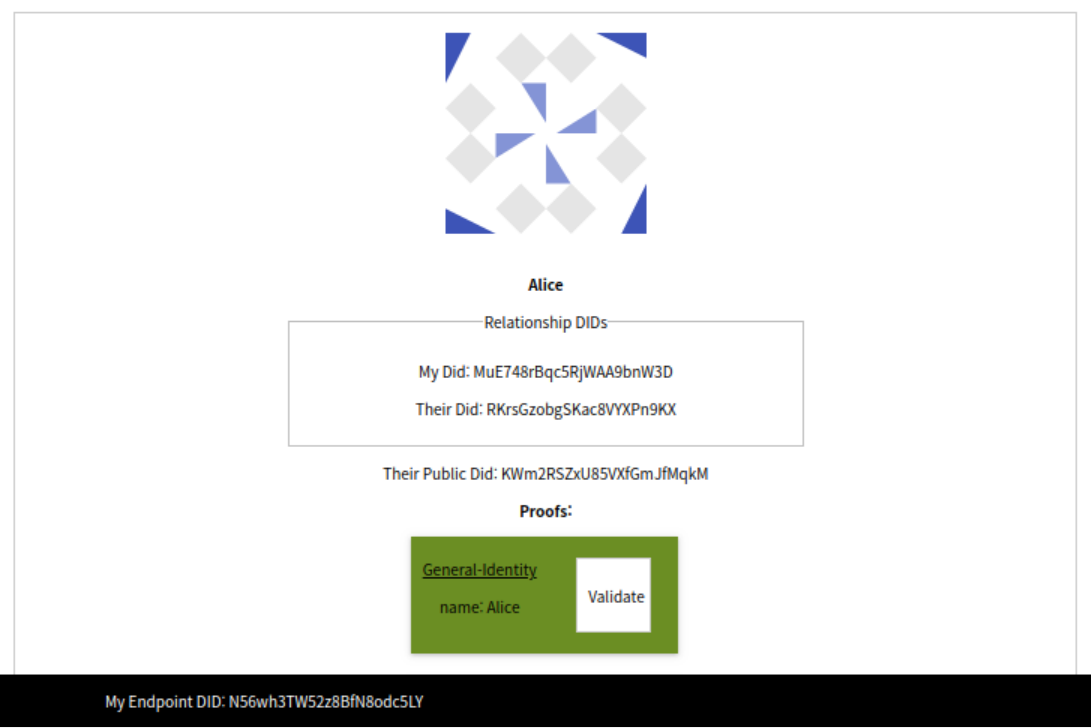
요청을 보내게 되면 relationship의 endpoint DID가 Faber college의 DID로 표시된다.
Faber college가 agent의 message 탭에서 요청을 수락하게 되면
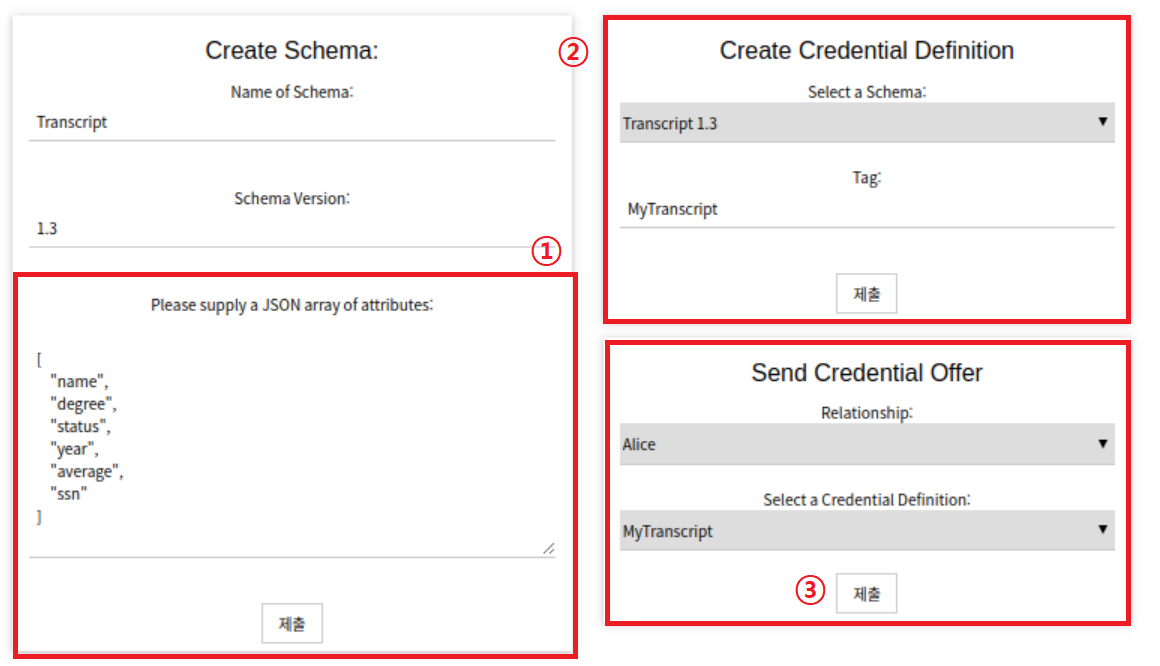
요청받은 Proof Request에 대해서 Issuing 탭에서 Schema를 생성한 후, Credential를 정의하고 Alice에게 Credential를 보낸다.
Alice가 자격 증명 결과를 message에서 수락하면 Credential 탭에서 본인의 인적사항 credential인 governmentID와 함께 성적 증명서인 transcript를 확인할 수 있다.
'SSI' 카테고리의 다른 글
| 22.05.17 주코의 삼각형 (0) | 2022.05.17 |
|---|---|
| 21.10.03 SSL/TLS 프로토콜을 통한 디지털 인증서 발행 과정 (0) | 2021.10.03 |
| 21.10.02 OAuth 2.0 기반의 SSO 동작 흐름 (0) | 2021.10.02 |
| 21.09.19 [Indy] demo 공부 (시나리오 및 도커 실행) (0) | 2021.09.20 |
| 21.07.20 DID 관련 용어 정리 (0) | 2021.07.21 |